DIY Guide to Replace a Bathroom Vanity
If you’re dealing with a new bathroom or remodeling an old one, and you’re trying to stay on a budget, you have to know how to replace a bathroom vanity.
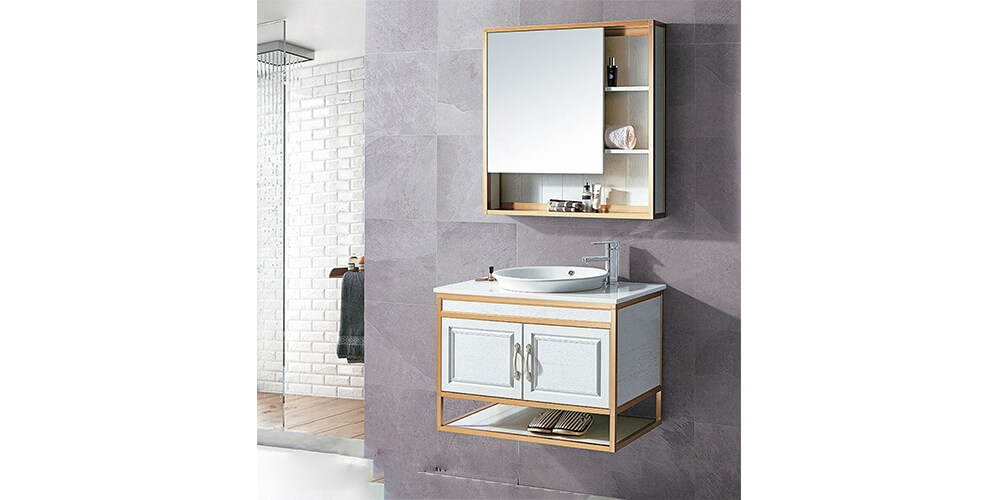
When you’re remodeling a bathroom, your choice of bathroom vanity will either make or mar your bathroom. Most people feel that bathroom vanities are not important especially in small bathrooms, but that isn’t the case.
If you want your bathroom to pop and shine, then bathroom vanities are your go-to.
Ready to dive in?
Come on.
How to Replace a Bathroom Vanity There is a step by step DIY guidelines you can use to replace a bathroom vanity. They are:
To replace a bathroom vanity, you have to shut the water off You can’t replace a bathroom vanity when the water is flowing with speed. It will obstruct the entire process. You have to disenable the supply lines, then use a bucket to catch any flowing water that could possibly drip from the lines and p-trap.
For those who don’t know what a p-trap is, it’s the white pipe in the center that is curved.
Take away the countertop The next step is to take away the countertop. You have to loosen the caulk between the wall and the vanity. A knife or sharp metal object can be used.
Be very careful when taking away the countertop to avoid any form of damage. If the vanity is big, you are advised to have someone remove it with you.
It’s time for the old vanity to go The old vanity has to go now. Gently untighten the screws that hold the vanity to the wall. You can either carry out this process manually or with a cordless screwdriver, but a cordless screwdriver will make it easier.
If you’re using the screwdriver, apply firm pressure and put it in line so the screw doesn’t fall out of place.
Place the new vanity appropriately Look for the studs in the wall and create a mark slightly above the top of the new vanity. Also, mark the new place for screw holes.
Then position the vanity appropriately.
Time for faucets If you want faucets, now is the time to install them. Install them according to the manufacturer’s instructions. Most people that go through the DIY part don’t consider this step necessary, but it is because it will hasten the job’s speed and change the appearance of your bathroom.
You wouldn’t want to spend a long time crouching under a sink now, would you?
Attachment Now, attach the vanity to the marked spots on the wall. Tighten with screws.
Secure the top Using a caulk, run a straight bead over the top of the vanity base, then attach it on top of the vanity. Be extremely careful about this process. Any failure or spill could mess up everything.
Back to the plumbing Now, re-enable the plumbing and also reconnect the p-trap if it’s damaged or old. Use Teflon tape to tighten it appropriately.
Final step Rub a bead of caulk around the countertop edges, and even it out with your fingers.
There! You’re good to go…